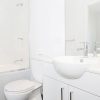
Here’s a quick bathroom renovation guide to help you understand what’s involved.
Your bathroom may be one of the smallest rooms in the house, but along with your kitchen it’s usually one of the most challenging to renovate. We’ve been managing complete bathroom renovations in Auckland since 1996, so we understand the whole process – from smart bathroom design ideas to value-add finishing touches.
Bathroom renovation steps
1. Bathroom design ideas
Experienced bathroom design ideas can make all the difference. For the bathroom layout, think about what you see as you enter and where fittings are placed in relation to each other. Moving fittings will add cost, so it helps to know which ones are cheaper to relocate. With your bathroom layout sorted, it’s time to think about tiles, tapware, colours and textures.
2. Bathroom renovation costs
Now you’ll need to work out an initial costing for materials and labour. There’s nothing worse than having to live with a barely-finished bathroom because the budget ran out.
3. A project plan for bathroom renovation
Creating a bathroom renovation timeline is the next step. This involves listing all the tasks involved, allocating realistic times and deciding who will do each one.
4. Find and book the required trades
A bathroom renovation can require up to eight different trades, each one coming and going at different times. The plan needs to allow for jobs that take longer than expected.
5. Isolate power and water
Before any demolition work begins, a plumber and electrician need to isolate the water and power to your bathroom. You don’t want to risk expensive leaks and possible electrocution.
6. Bathroom demolition
Removing and disposing of old fittings and wall coverings is next. You may need to revise your project plan, depending on what is uncovered.
7. Bathroom renovation preparation
The builder will fix any walls that aren’t plumb or square, replace any rotted timber and add bracing for mounting your new fittings.
8. Install new bathroom plumbing lines
Now the plumber can return to install water and drain pipes, ready for the fittings.
9. Install bathroom wiring
The electrician is usually next, installing wiring through the walls and ceiling to where electrical fittings will be located.
10. Waterproofing the bathroom walls, ceiling and floors
This is a specialist job that needs to be done properly. Any water egress can cause hidden damage and the need to start the renovation process again.
11. Bathroom underfloor heating
If it’s in your project plan, this is often installed by a specialist and connected by an electrician.
12. Bathroom tiling
Tiling can make or break the look of your bathroom, so DIY here is not recommended. Your tiler will start with the floor and, once that can be walked on, continue with walls or shower.
13. Installing the toilet, shower taps and vanity
The plumber returns to install and connect your fittings to the water pipes and drainage.
14. Installing electrical fittings
Now it’s time for the electrician to return to install and connect the switches, wall plugs, heated towel rail, extractor fan and so on.
15. Finishing your bathroom
A builder returns to add the finishing touches, like architraves, doors, cabinetry, hand towel rails and a toilet roll holder.
16. Painting bathroom
Your final trade is a painter, who will use skill and experience to bring your beautiful finished bathroom to life.
We make it so easy
Jubilee Bathrooms provides a complete one-stop bathroom re-build service. Our free in-home consultation and quote will cover your complete bathroom renovation, including materials and fittings. Our team of specialists take care of everything. We communicate with you every step of the way and stand beside you when the job is done.


